I think I've found a fairly fool-proof way of reproducing an effective wood finish.
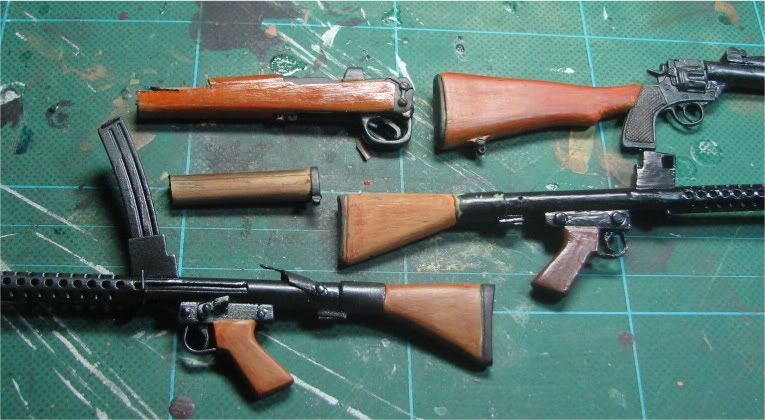
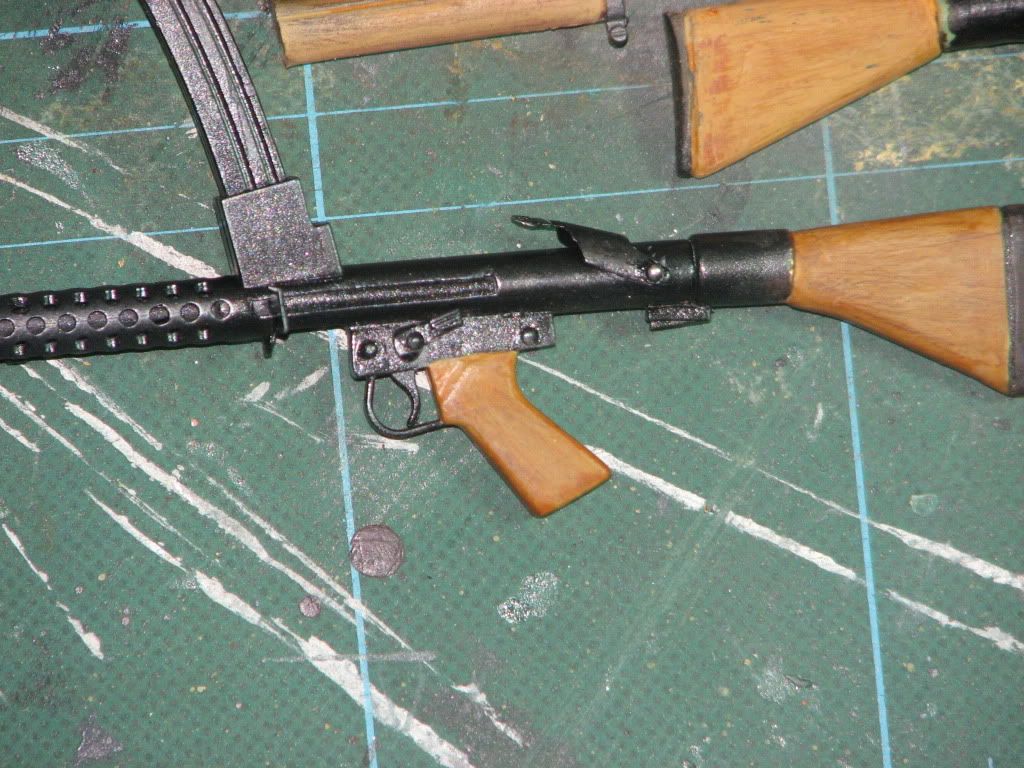
Here are some initial photos - not that good as SWMBO (Transl. = She Who Must Be Obeyed) has gone travelling with my camera and I'm using hers, which I'm not familiar with. The effect looks very effective in real life - honest chaps!
I'll try and do a tutorial this w/e, but the basic method is below.
Here are some initial pics:

The Method - essentially:
1. Apply a base coat of Tamiya Desert Yellow XF-59 acrylic. (You could obviously use a lighter or darker colour to vary).
2. Run a wire brush (I use an old suede brush) hard along the length of your base coat - you may want to do a couple of passes - to put a 'grain' in to the paint
3. Rub some dark brown pastel along the length so it gets in the grain. Wipe off any excess with your finger or tissue. (Again, you can try varying the colour to add variety).
4. Apply a coat of thinned Tamiya Clear Orange X-26 acrylic. You may want to add a touch of matt base to the Clear Orange to 'knock it back' a bit, as the Clear Orange comes out quite glossy.
Done! A I said, I'll try to add a tutorial with photos, but you can see how easy it is.
Here are some initial photos - not that good as SWMBO (Transl. = She Who Must Be Obeyed) has gone travelling with my camera and I'm using hers, which I'm not familiar with. The effect looks very effective in real life - honest chaps!
I'll try and do a tutorial this w/e, but the basic method is below.
Here are some initial pics:
The Method - essentially:
1. Apply a base coat of Tamiya Desert Yellow XF-59 acrylic. (You could obviously use a lighter or darker colour to vary).
2. Run a wire brush (I use an old suede brush) hard along the length of your base coat - you may want to do a couple of passes - to put a 'grain' in to the paint
3. Rub some dark brown pastel along the length so it gets in the grain. Wipe off any excess with your finger or tissue. (Again, you can try varying the colour to add variety).
4. Apply a coat of thinned Tamiya Clear Orange X-26 acrylic. You may want to add a touch of matt base to the Clear Orange to 'knock it back' a bit, as the Clear Orange comes out quite glossy.
Done! A I said, I'll try to add a tutorial with photos, but you can see how easy it is.