• Pardon the dust while the boys rebuild the site.

    The board will be in a state of disarray as I get things sorted out, for a little while at least.

    The new incarnation is using Xenforo as the system software. It is much like what we are used to, with a few differences. I will see about making a FAQ to help point out the differences for the members.


    One IMPORTANT difference for all of us old timers is that the 'mail' system is replaced with what are called 'conversations'/

    There is no 'Inbox' or 'Out box' or 'Sent' folders anymore.

    Think of Conversations as private 'threads' or topics that don't exist in a forum, that you start with another member. NOTE: Conversations can include more than one member if you or someone else in the conversaion, likes.
    Takes a little getting used to but I am sure you all can get a hang of it.


    Only a slightly modified default default Xenforo style is available for now. Once the new SAG style is ready it will be available.

    All existing users should be able to login with their usernames and passwords once the site goes up.


    If anyone has difficulties logging in please contact me at sixthvanguard@gmail.com.


    Thank you for your support and patience. I know it has been a loooong road.

Monkey Rabbit Pz III Ausf ?

egonzinc

Brigade Commander
I think my next project will be a Monkey Rabbit PzIII.

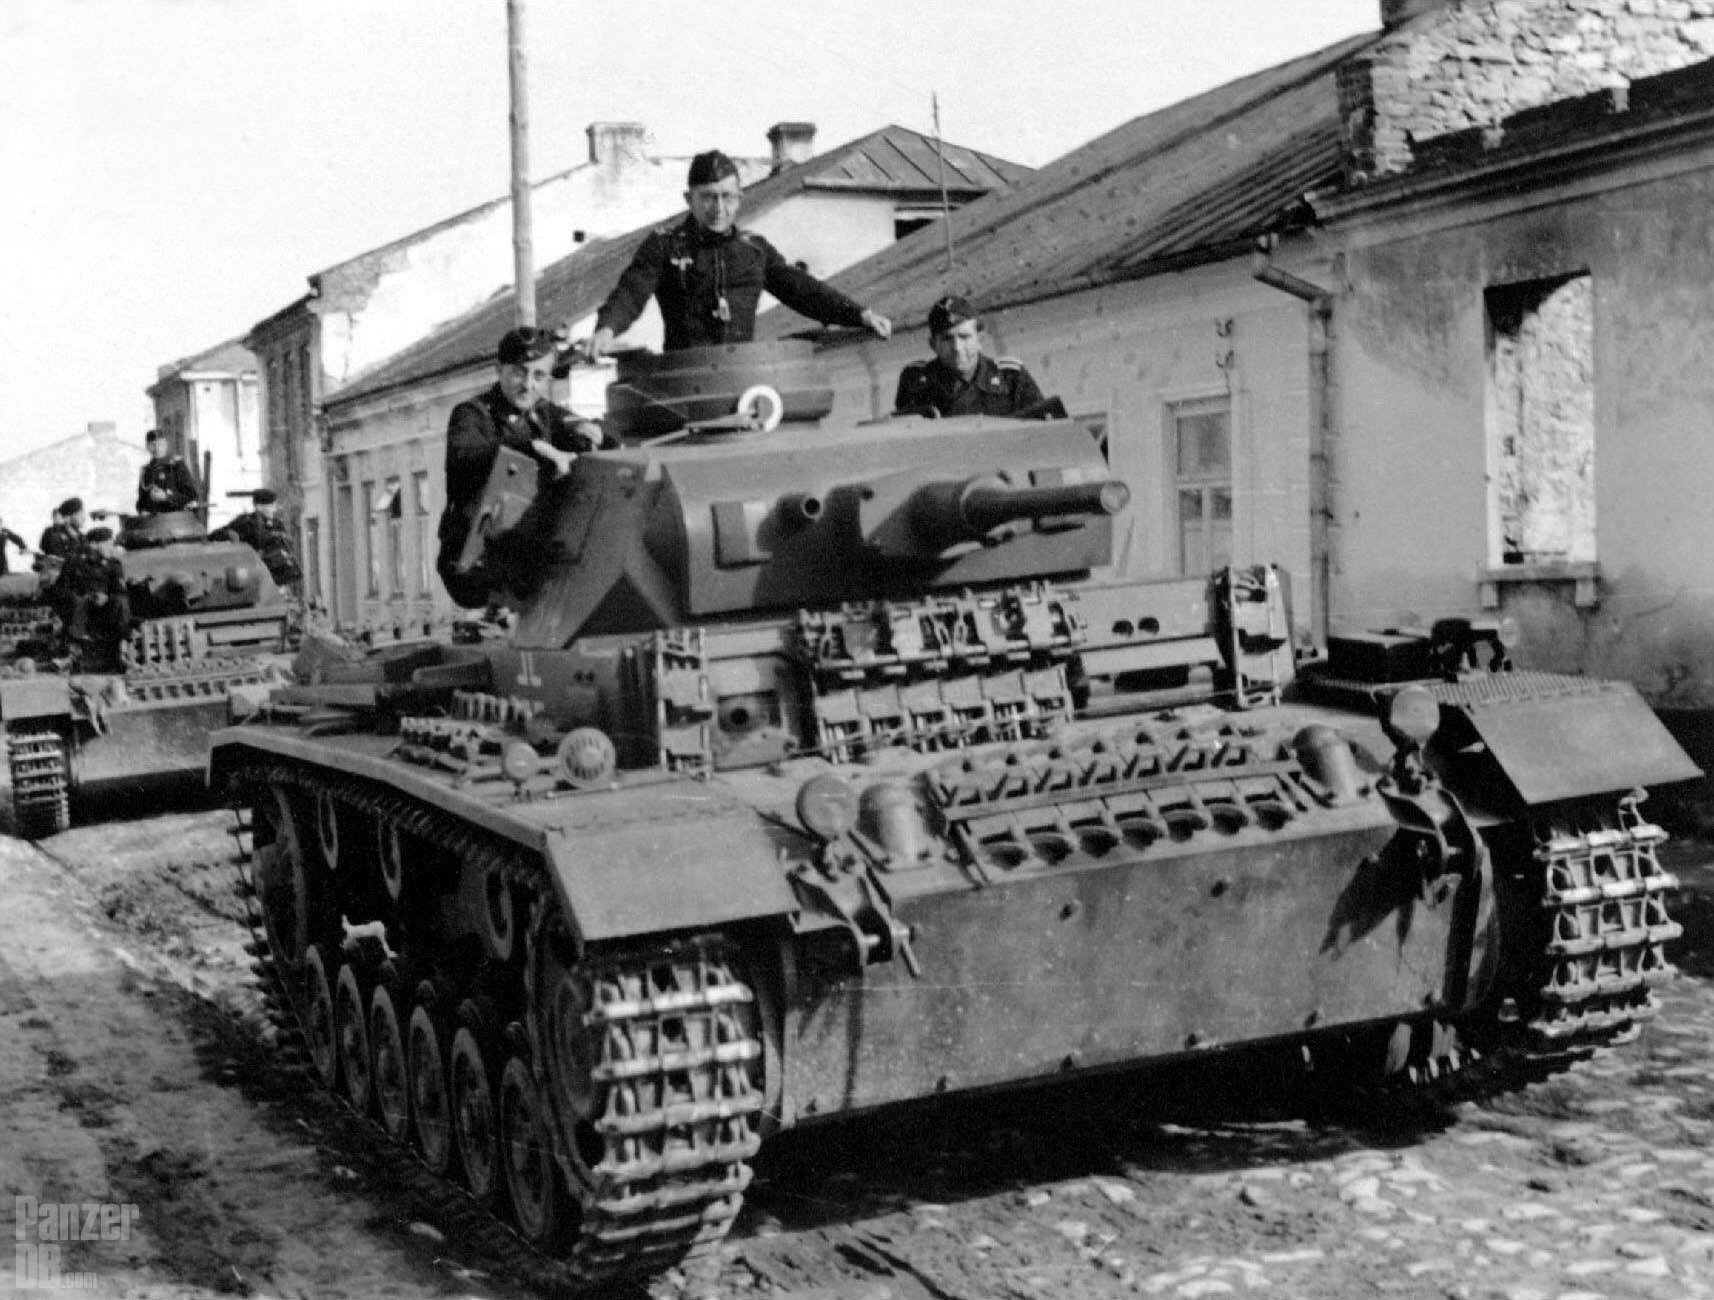
When I first got it, I looked it over and identified it as an Ausf H.
BUT, the engine covers (one piece) and the vents on the engine hatches (running along the axis of the tank) are correct for an Ausf L.
And yet, in an image (not a photo) I find an early Ausf J with the vents as in the model!

I know nothing in 1/6 is perfect, but it is a very nice model and it was a relatively easy detail to do right.
Of course it could be an Ausf H or early J, with upgraded Ausf L engine covers…
An Ausf H or early J would fit a summer of 1941 time frame.
The Ausf L’s were produced in the second half of 1942. So such an upgrade pushes the vehicle to that time frame.
The tank’s gun barrel is the L/42 50mm gun. The length is perfect, but it must be a bit wider that it should. Does not pass my “eye test”.

Mentioning this here partly venting my frustration and partly trying to help out any one out there that has one of these and was wondering what type (Ausf) it was!

These small mistakes should not bother me, but they do! Jajaja!
I’m sure it will turn out great… now must decide on a time and place and go for it. Initially I was going for summer of 1941… now I’m not sure… But probably will go with the summer of 1941 early Barbarossa and ignore the engine covers!

Appreciate any comments. This is therapy!:cool:
 
Last edited:
I have had my Monkey Rabbit PZ III for three plus years and it is a fantastic piece. Kingsley (owner of MR) hit upon a great way to build sturdy, light weight tanks that look very nice and lend to some great upgrades if the owner wants. Weld lines and upgrades on some detail parts only enhance a fine model along with a paint job. Have fun with it and please share some photos when done.

Jeff (Geppetto):!:
 
I spent time looking at different PZIII's. The MR model is just as you explained. I would leave the hull as is and add an up-armored gun mantel and front plate in front of the drivers visor. And change the gun to a 5 cm KwK39 L/60 with the longer barrel. Making it an L version. It would fit the time period of '41/'42.


Link to a model of the up-armored PZIII L : https://karopka.ru/upload/resize_cache/iblock/30b/900_600_1/photo_15_1455394776.jpg


Which ever you way decide to go, it will make a great display with your modeling skills!
 
I spent time looking at different PZIII's. The MR model is just as you explained. I would leave the hull as is and add an up-armored gun mantel and front plate in front of the drivers visor. And change the gun to a 5 cm KwK39 L/60 with the longer barrel. Making it an L version. It would fit the time period of '41/'42.


Link to a model of the up-armored PZIII L : https://karopka.ru/upload/resize_cache/iblock/30b/900_600_1/photo_15_1455394776.jpg

Which ever you way decide to go, it will make a great display with your modeling skills!

I will go with an innacurate ausf H. Your recommendation is a good one, but I already have two Mardon ausf L. Both made up for end of 1942, one on the road to Stalingrad and the other DAK.

15 years ago, my top vehicle want was a L/42 PzIII, so this one will be a Russian front tank. Not sure if I will add markings fir it to go with my ausf L or do completely different markings. It us a big temptation to do it DAK as I just love the short barrel PzIII in Africa “ look”.
 
Last edited:
I have had my Monkey Rabbit PZ III for three plus years and it is a fantastic piece. Kingsley (owner of MR) hit upon a great way to build sturdy, light weight tanks that look very nice and lend to some great upgrades if the owner wants. Weld lines and upgrades on some detail parts only enhance a fine model along with a paint job. Have fun with it and please share some photos when done.

Jeff (Geppetto):!:


Will do! Getting all the parts together now.
Decided to move the fender supports using a blueprint diagram. The stock vehicle had the front two pieces out of place, which made it impossible adding the tools, jack block etc… It was much easier than I expected. Akso strengthened the turret bin attachment to the turret.

The more I look over the model, the more I regret not getting their
T-34/85. And the mire I regret that they are no longer in business.
 
Decided to do some WIP videos of this build. Will be posting them as I go aling on youtube. egonzinc is the name of the “channel”… I will try grouping some videos, but none will be more than 10 minutes as it gets complucarpted. I did something similar a year ago as I was DPW (detailing, painting and weathering) a Reconpanzer 38t
The furst one posted is an overall look of the model and the planning and preparation of the tools and where I will place them on the vehicle.


Here a link to the channel

https://www.youtube.com/channel/UC8WkDsrq_XjL5QsQ45Te4vw/videos
 
Last edited:
You know you want to do the DAK version!
You are right! I mentiined earlier that I always wanted a short barrel PzIII in DAK colors, but I gave up once I had a clise encounter with Al Franco and then much later Dragon stopped making vehicles. In between I git a second Mardon Callanta PzIIIL, and last year I got it done. Realuzed I coukd strip a small corner of my yard to get images
Outside, but it is still far from ideal and limited in results and space.
A Russian front “H” would fit better with my other vehicles.
For the sake of variety, I could also go winter whiye wash, end of 1941. Which would be a nuce complement to the collection as a whoke, but as the DAK alternative has limited pkayability in my outdoor area.

Decisions, decisions. In favor of DAK and winter options is the variety and signifucance of the type. An H in the second half of 1941 was the best tank the Germans had. By the second half of 1942 it was a second class piece of armor…
 
I know!

Build progressing nicely… not a fan of the “3D lines”, but as I often say, nothing is perfect in 1/6.

Did anyone out there with 3D skills make a more accurate barrel for this model?

The interior of the barrel is 12mm and should be between 8-9mm.
Looks more lika a 75mm than a 50mm gun…
 
Maybe use some metal aluminum or copper tubing?


I use the hollow metal pool sticks from Wal Mart for gun tubes and other things on some of my stuff.

It is such a particular shape, not sure I can wing it...


Trying to figure out what are the pieces holding on the extra track links in the area of the mg and the driver's visor...

DQYbj_KWAAAWHht
 
It looks like there are multiple links. There are 6 going horizontal and looks like 2 sets of maybe 4 going vertical draped over the horizontal links.
For the gun barrel maybe check with ARMORTEK and see if they have any.
 
If you look close at the base of the front plate spaced armor you'll see a hole on the right and left side of the MG port and the drivers vision block. There appears to be a cable running through the tracks. You can also find a hole at the top of the MG port and barely make out a cable there
 
It looks like there are multiple links. There are 6 going horizontal and looks like 2 sets of maybe 4 going vertical draped over the horizontal links.
For the gun barrel maybe check with ARMORTEK and see if they have any.

Thanks! I was looking at the edge of the trak links as a separate piece.
I see it now!
 
If you look close at the base of the front plate spaced armor you'll see a hole on the right and left side of the MG port and the drivers vision block. There appears to be a cable running through the tracks. You can also find a hole at the top of the MG port and barely make out a cable there

Yep, saw that cable… maybe use some painted rope…

Thanks!
 
Back
Top