• Pardon the dust while the boys rebuild the site.

    The board will be in a state of disarray as I get things sorted out, for a little while at least.

    The new incarnation is using Xenforo as the system software. It is much like what we are used to, with a few differences. I will see about making a FAQ to help point out the differences for the members.


    One IMPORTANT difference for all of us old timers is that the 'mail' system is replaced with what are called 'conversations'/

    There is no 'Inbox' or 'Out box' or 'Sent' folders anymore.

    Think of Conversations as private 'threads' or topics that don't exist in a forum, that you start with another member. NOTE: Conversations can include more than one member if you or someone else in the conversaion, likes.
    Takes a little getting used to but I am sure you all can get a hang of it.


    Only a slightly modified default default Xenforo style is available for now. Once the new SAG style is ready it will be available.

    All existing users should be able to login with their usernames and passwords once the site goes up.


    If anyone has difficulties logging in please contact me at sixthvanguard@gmail.com.


    Thank you for your support and patience. I know it has been a loooong road.

Dragon M4A3 build, help needed.

USMCPrice

Mortarman
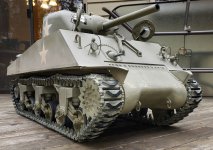
I'm building the Dragon M4A3 75mm and upon surveying the kit, one of the most glaring issues is a lack of cast texture.

Does anyone have a technique for adding a good scale representation of this?
 
Mr. Surfacer is good for small stuff, but for a 1/6th scale model I think you will be disappointed with the results. I just don't think they are coarse enough. Personally I would kinda do it like John from East Coast Armory. Use some glazing putty, apply it unevenly in the area you want textured, and then sand it down to the texture you want. If you sand too much, you can just add some putty on top and sand again. Those little bottles of Mr. Surfacer aren't cheap either. The Tamiya putty mixed with glue method will give a rougher texture, but it does dry fast and on a big model it takes quite a bit of glue and putty to cover. On the Dragon Sherman you will be covering pretty much the entire turret and the transmission cover. That's a lot of area.
 
Actually the most glaring issue with this kit is the tracks. They are barely suitable for static display and definitely no good for RC use. The small retainer pins break off easily.
 
Actually the most glaring issue with this kit is the tracks. They are barely suitable for static display and definitely no good for RC use. The small retainer pins break off easily.
I was curious about that, but I figured that was down the road. Have you built the kit?
If so, what did you do about the tracks?
Any one mod them in some manner to make them work or is replacement the only option?

Thank you for the info.
 
Yep I've built one and converted it to RC. Its possible to 3D print new tracks or modify the existing stock ones (for RC). It depends what you want to to do with it. You could replace the stock pins with nails or other pins. I used the Spyker tracks as I felt they were the best option for RC although not cheap ($700). That was before I had a 3D printer. Now I'd probably print my own, but that is also a major task. It builds into a very nice model - plastic is very nice and easy to work with.

Tank2.jpg

Tank3.jpg
Bob
 
When I built mine a couple years ago I used glazing putty that I picked up at NAPA auto parts, a big tube only cost about $9 and there is more then enough to do the whole tank, it dries quickly and is very sandable because it's made for body shop service.
Since mine is just static I didn't worry about the track, good enough.
 
Leonard yes I think its here on 6th Army. Some of the earlier photos were hosted by Photobucket.

 
Back
Top